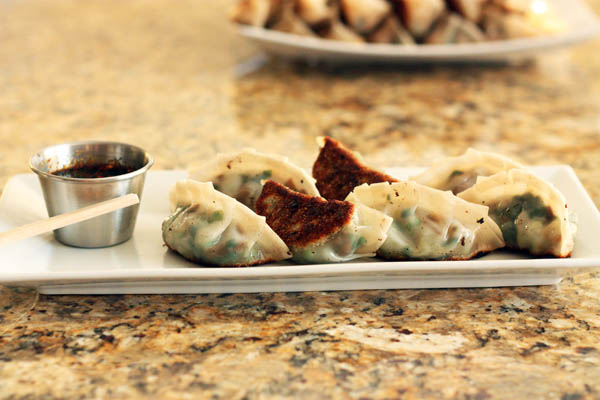
Sweet Pea & Mushroom Potstickers
A while back, I made a batch of potstickers that ruled over all other potstickers I had eaten. They were savory and rich and perfect, and as a result I dedicate time each year to can Ginger Apple Chutney, the driving force behind them.
As far as Brad is concerned, they are the only potstickers worth eating – why even bother, he asks? I, on the other hand, have yet to find a filling for these fried little dumplings that I don’t like, so I occasionally play with alternatives. This is, currently, my favorite alternative.
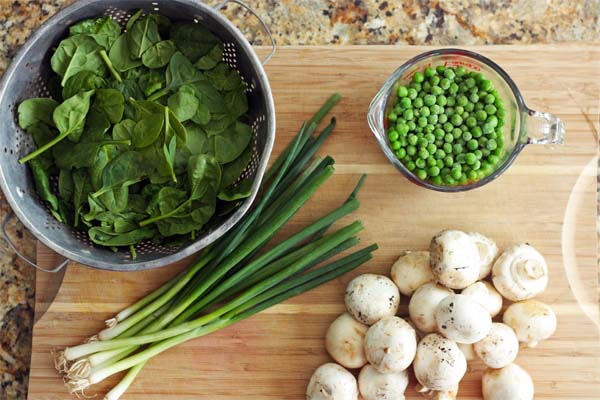
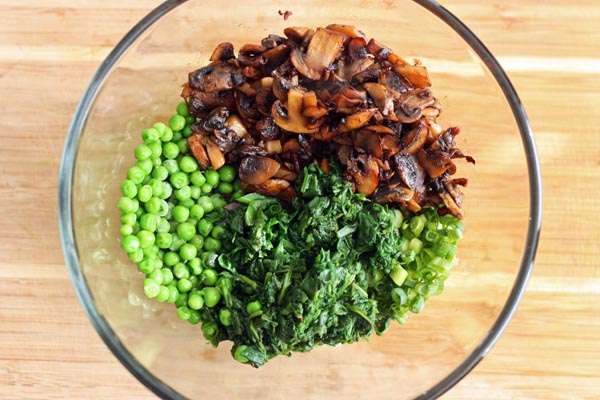
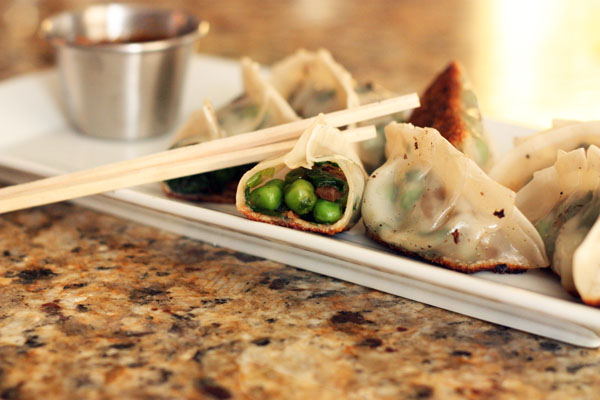
If the Pork & Ginger Apple potstickers taste like autumn, these ones taste like spring. The ingredients are fairly simple: crisp green onions and peas accompanied by sautéed spinach and mushrooms. The bright flavors of the onions and peas are balanced out by the dark, earthy spinach and, my favorite, mushrooms sautéed in butter and soy sauce.

Though the filling is mixed, the tedious (and somewhat off-putting) aspect of potstickers lies ahead: assembly. Though it’s not difficult to create these little pouches with a frilly, folded edge, it does take some time and is usually the reason I only make potstickers as a treat rather than a weeknight meal. However, because they freeze so nicely, putting the effort in for a couple hours on a Sunday afternoon can result in multiple super-quick weeknight meals from the freezer.
Plus, folding your potstickers be a simple or as complex as you like. When I first started, I just folded them over and squashed the edges together. I’ve seen fancy ones at restaurants with TONS of folds that must have been created by people with less chubby fingers than me. These days, I like my six-fold method, which provides makes them nice and pretty but also helps the bottom stay nice and flat for a larger crisping area.

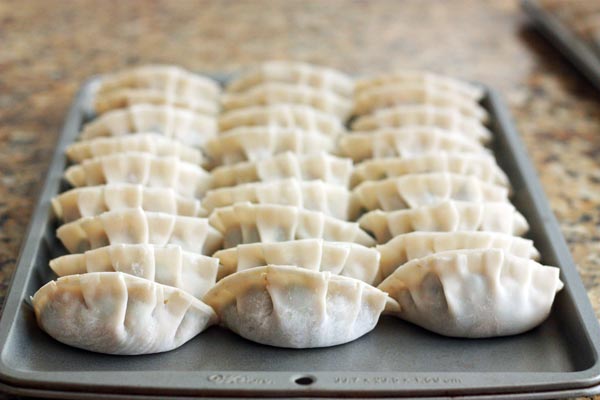
Suddenly, after working six at a time, you’ll have a whole army of perfect little pouches.
At this point, you can freeze the potstickers for future quick dinners. Or, you can cook them by crisping the bottom, steaming the dumplings, and then re-crisping the bottom again before serving.
The resulting potstickers are delightfully springy. You could certainly put all the ingredients in a food processor if you want a smoother texture, but I like the contrast between the bright, crisp peas and the soft, salty mushrooms. You can also mix up the ingredients, if you like. Prefer edamame instead of peas? Tofu instead of mushrooms? They’re quite flexible.
Happy spring dining!
Sweet Pea & Mushroom Potstickers
Makes about 48 potstickers
2 c frozen or fresh peas
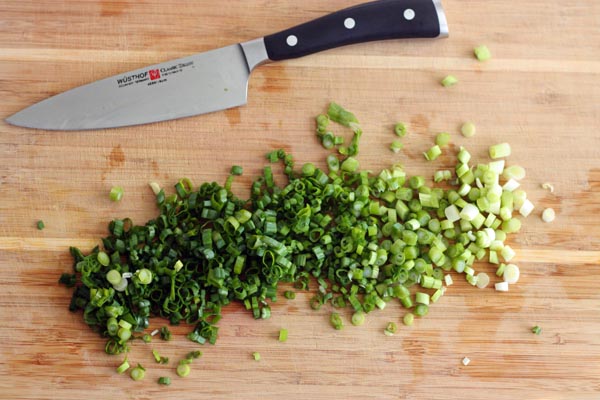
1 bunch scallions
1 pound white mushrooms
2 T unsalted butter
2 T soy sauce
1 tsp freshly-grated ginger
4 oz fresh spinach
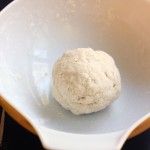
40-50 dumpling wrappers
canola or vegetable oil
chicken stock
soy sauce for dipping
Pour peas into a large mixing bowl (if using fresh peas, blanch peas and drain thoroughly before adding to the bowl). Chop scallions and add them to the bowl. Slice mushrooms, then wash and pat dry spinach.
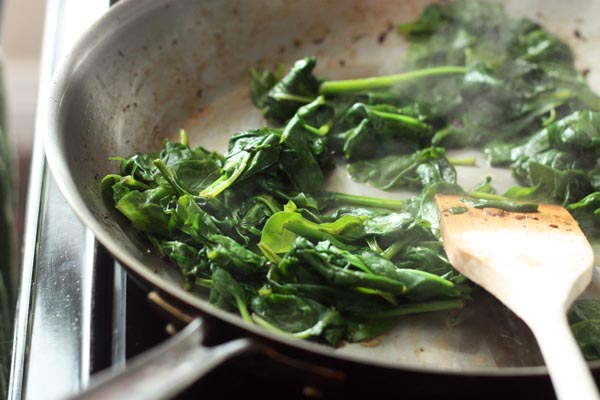
Heat a frying pan over medium-high heat. Add butter, mushrooms, soy sauce, and ginger. Sauté until mushrooms have cooked down and are nicely browned. Pour the mushrooms into the mixing bowl and return the pan to the stove, reducing the heat to medium. Add spinach and toss until it cooks down to be quite wilted, about 3 minutes. Add the spinach tot he mixing bowl and mix all ingredients well.
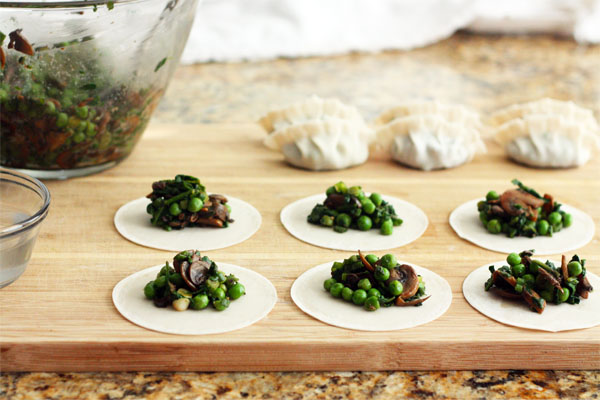
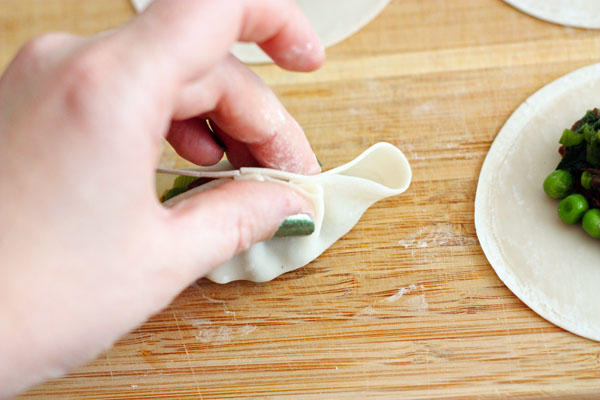
To form the potstickers, work in batches of no more than 6-8 at a time to prevent the wrappers from drying out. Place about two tablespoons of filling on each wrapper. You’ll want enough filling that the pouch will seem like it almost won’t close, but not so much that it doesn’t close. Dip your finger in a small bowl of water and wet the edge of the wrapper all the way around.
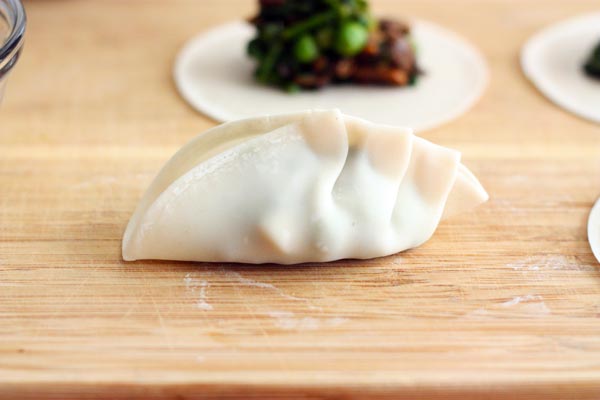
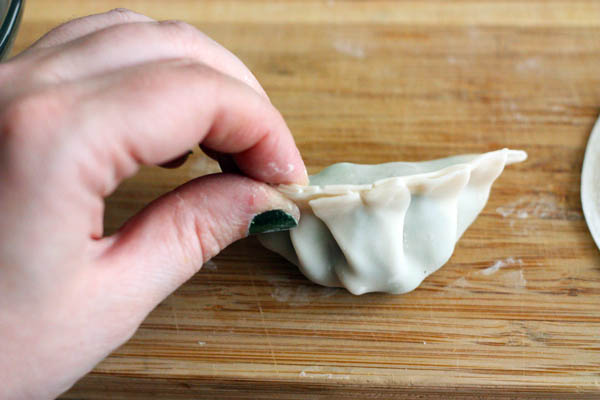
Fold the edges together to form a half moon shape by making a small fold in the front flap and pressing that fold against the back flap between your thumb and finger. Create another fold to the right of that and press against the back flap, and then another. Repeat with three more folds down the other side so that the entire pouch is sealed. You can daub additional water onto the wrapper if needed. Place completed potstickers on a cookie sheet and cover with a cloth to prevent the edges from drying out. Continue until all filling is used.
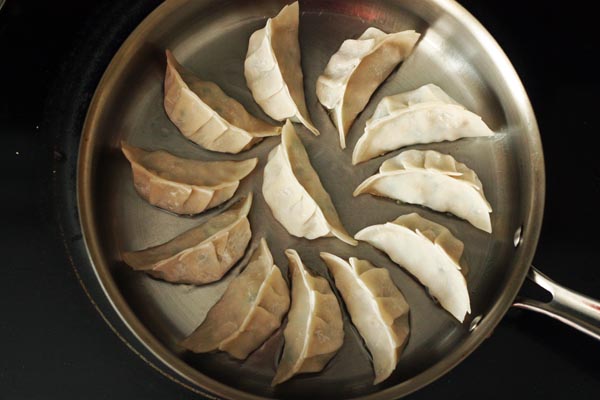
To cook the potstickers, heat a sauté that has a lid over medium heat. Add just enough oil to the pan to cover the bottom and heat until the oil glistens. Add the potstickers to the pan (as many as can comfortably fit with a bit of space in between) with the frilly seam facing up. Allow potstickers to cook without moving them for 3-4 minutes or until the bottom is golden-brown and crisp to the touch. Add 1/4 chicken stock to the pan and quickly add the lid. Steam the potstickers for 2 minutes.
Remove the lid and cook for one additional minute so the bottoms of the potstickers crisp back up. Remove to a serving tray and repeat with remaining potstickers. You may need to add more oil between each batch.
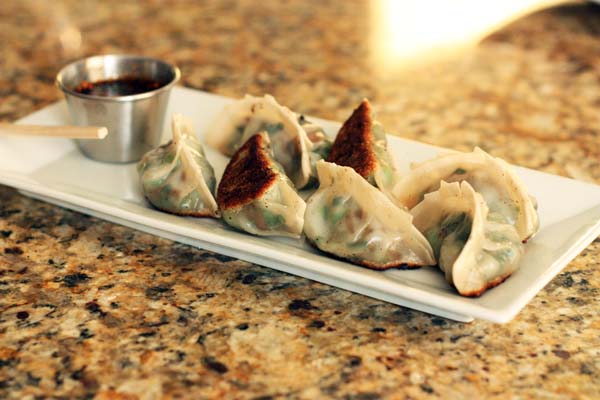
Serve immediately with soy sauce. You can jazz up the soy sauce a bit by adding a pinch of garlic, ginger, or red pepper if you like.
To Freeze: If you want to freeze your potstickers, freeze them before you cook them by laying them on a cookie sheet so they are not touching and freeze until solid. Then place them all in a freezer-safe plastic bag and store. To cook, use the same sear/steam/sear instructions as above, though you may need an extra minute of steaming.