Spiced Applesauce

So.
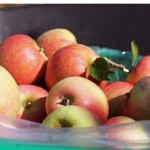
Remember the apples?
I brought home about 45 pounds of them and have hardly mentioned them since?

Yeah, those apples.
I’ll be honest, my favorite way to eat apples is whole and raw, so I don’t actually use them in many “recipes”. But I decided this year that, in order to ensure none went to waste, I would cook some down to make something I could use as a breakfast, a snack, a side, or a gift: applesauce!


Applesauce is, I think, drastically under-appreciated. It can be a cool, refreshing snack or a warm, hearty accompaniment to a well-seasoned pork chop.
I grew up on applesauce canned by my grandma, and I tried my first batch last spring with the end of that year’s batch of apples. However, I couldn’t actually can my own, as I did not have a water bath canner, a key piece of equipment for safely preserving a variety of foods.

But finally! The gi-normo pot has made its way into my apartment. Oh, the possibilities to come.
You can definitely make apple sauce without one of these guys, but you won’t be able to safely store your goods outside of refrigeration.
Next! Another handy tool: an apple peeler. Now, you can DEFINITELY make applesauce without this, but I don’t particularly recommend it. Peeling apples is… tedious. And it creates a lot more waste than this slim little blade.


Before you know, you’ll have big pot of peeled apples and the start of your very own compost pit.

From there, applesauce is pretty straight forward. Cooking apples, blending them into mush, adding sugar and spice (and everything nice?), scooping the hot sauce carefully into jars, and then boiling the jars, and voila!
But we can’t stop there. Oh no. Of the fifteen pints of apple sauce I diligently prepared, I gave thirteen of them away as gifts. I couldn’t simply give jars away.
Pretty jars! Pretty jars are better jars.


I think next year I’ll need even MORE apples. So that I can save more than two jars for myself. Maybe.
Because this is better than anything I can find in the store.

Spiced Applesauce
Adapted from the Ball Complete Book of Home Preserving
Makes about 8 pints
Note: This recipe includes considerably less sugar than the original. Add more if you like a sweeter sauce, or remove it completely. The lemon juice, however is NOT negotiable. It will prevent your apple sauce from becoming darker over time and maintains a high acid level to ensure your canned goods remain safe to eat.
6 1/2 lbs apples peeled, cored, and quartered (about 10-12 pounds of whole apples)
water
1 c white sugar
4 T lemon juice
2 tsp ground cinnamon
1/2 tsp ground allspice
1/2 tsp ground nutmeg
Place prepared apples in a large stock pot with a lid. Add enough water to allow the apples to be stirred easily, which is enough to cover all but 2-3 inches of the apples. Over relatively high heat, bring apples to a boil. Place lid on the pot and cook for 10-18 minutes or until the apples are tender (this will vary with the variety of apple).
Remove apples from heat and allow to rest for 5 minutes. Working in batches, transfer apples with a slotted spoon to a food processor or blender, shaking off as much water as possible before the transfer. Pour sauce into a second pot. If you prefer a chunky applesauce, you can simply transfer the apples to the second pot and then mash with a potato masher.
Add lemon juice, sugar, and spices to the apples and stir thoroughly. Taste the sauce and add more sugar or spice if desired.
Serve immediately OR store in an airtight container in the refrigerator for up to two weeks OR can.
For Canning
Before slicing your apples, sterilize jars and lids. I run mine through an empty dishwasher and keep them on the heated dry cycle to ensure the jars stay warm. Prepare your waterbath canner as your apples are cooking. Once applesauce is prepared, return it to the stove and keep at a low boil as you ladle it into your jars, allowing 1/2″ headspace. Remove air bubbles from jars by tapping gently on the counter and wipe the rims with a clean, damp cloth. Place flat lids on jars and spin on rings until they are fingertight (do not over-tighten).
Place jars in canning rack bring to a boil. Process for 20 minutes (time should be increased at higher altitudes). Remove canner carefully from heat by sliding it to a cold burner and remove lid. Allow to sit for 5 minutes, then remove jars using jar tongs, being careful not to tilt the jars. Set jars on a towel and don’t worry about the water collecting on the top, it will evaporate as the jar cools.
Allow jars to sit undisturbed for 12-24 hours. Remove rings from jars and ensure that a solid seal has formed. Label and store in a cool, dark place. Refrigerate after opening.
Suzy
January 5, 2012 @ 1:22 pm
Thanks! Looks great! We haven’t tried ours yet, but I know we will put it to good use this weekend with some nice pork!
Brad
January 6, 2012 @ 12:13 pm
Apple #1 to Apple #2: “Hey, what are you in for?”
Apple #2: “Sauce. Spices. Mostly sauce. You?”
Apple #1: “I was eaten alive.”
Apple #2: *Shudders*
Shannon
January 7, 2012 @ 10:01 pm
I made applesauce and apple-pear sauce last year and froze it. Then the freezer door was left open so my mom decided everything had to be thrown-away, including all of my applesauce. I was not there to stop her. It made me sad.
Natalie
January 29, 2012 @ 2:33 am
Just finished making this! Literally, just now. Thumbs up all around from my roommates and I. I made them with Galla apples. I would have preferred Honey Crisp, but this did just fine.
Applesauce and Scrumpy. « Littlehouseonthesandpit's Blog
April 1, 2012 @ 8:39 am
[…] Apples Jazz Apples for this batch. I peeled then cored them, saving everything. I used this Recipe Spiced Apple Sauce loosely and filled some saved cans as well as standard canning jars. This won’t last long and […]
Marie
January 30, 2013 @ 5:34 pm
Looks delicious! Thanks for sharing!
But you know, you can make jelly out of those cores and peels before you compost them. It’s wonderful! I do that with my peach peels/pits. Yummmmy!