Best Ever Homemade French Fries
Every once in a while, I come across a recipe for a homemade version of a dish that I’ve previously classified as “will-never-be-made-as-well-at-home” that blows my mind. It’s the culinary equivalent of an explorer uncovering an ancient temple, a researcher finding stunning results, an eager learner having their first philosophical epiphany. I’ve felt this on a number of things I’ve shared with you here: yogurt, fresh mozzarella, handmade pasta, beef jerky… all products that, a few years ago, I never would have considered being possible.
Such was my opinion with french fries. I always heard other people talk about making them, but I was firmly convinced that they couldn’t possibly be as good as fries I could get from my local burger joint. I’d learned that the best fries are cooked twice: once to actually cook the potato so the inside of the fry is light and smooth, and again to give that light-and-smoothness a crisp outer shell. There was no way I could be bothered to hand-cut my own fries, purchase large quantities of oil, possibly a deep-frier, and then cook TWICE a side dish that I could have exactly perfect in 10 minutes from a dozen restaurants near by.
Folks, I have never been so wrong.
This method, which I’ve repeated already and plan to again, is SO easy and SO satisfying. No special equipment is required beyond what I’ll wager you already have in your kitchen. The ingredients are simple and few. And let me repeat: it is breathtakingly easy.
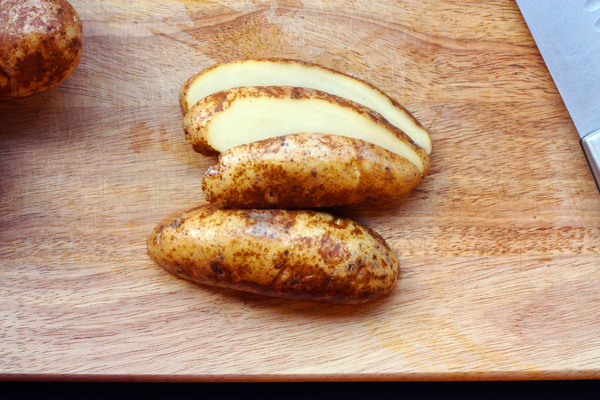
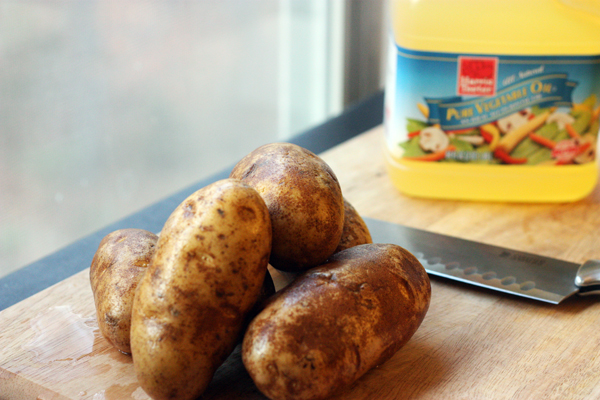
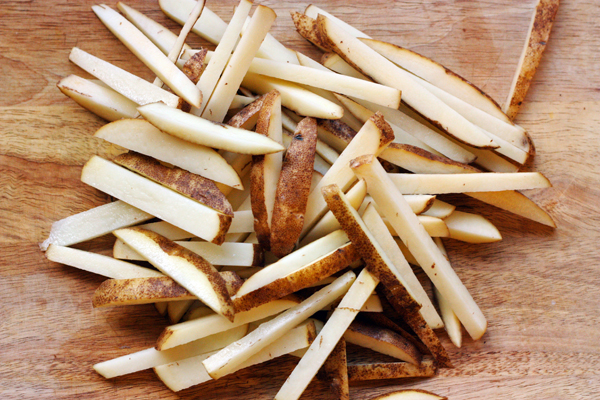
It starts, of course, with the humble but mighty potato. Russet potatoes are generally considered the best fry-making potatoes due to their high-starch, low-sugar content that yields a very fluffy baked potato or, in this case, a very fluffy inner-fry. Now that I know how to make these fries, I may invest in a fry-slicer, but it didn’t take long to chop these potatoes into sheets and then strips.
You can see I’ve left my potatoes unpeeled. I like a more rustic fry. Plus, potato skin is packed with fiber. Plus it makes more interesting pictures. But you can certainly peel your potatoes before slicing them if you prefer.
Once the fries are cut, they are added to a cold pot. I use a 6-quart Dutch oven, but any wide, heavy pot will do. Then oil is added to cover the fries by about an inch.
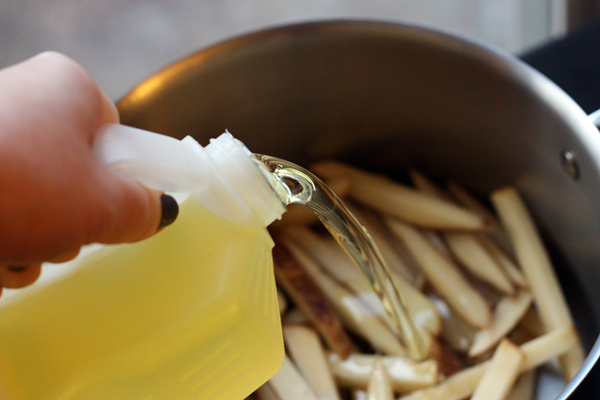
Then to the stove! As I mentioned earlier, many fries are cooked twice. These ones are not: they are simply cooked slowly. The oil is added cold, but as it heats over medium, it gently poaches the fries to give them that fluffy center we’re after.
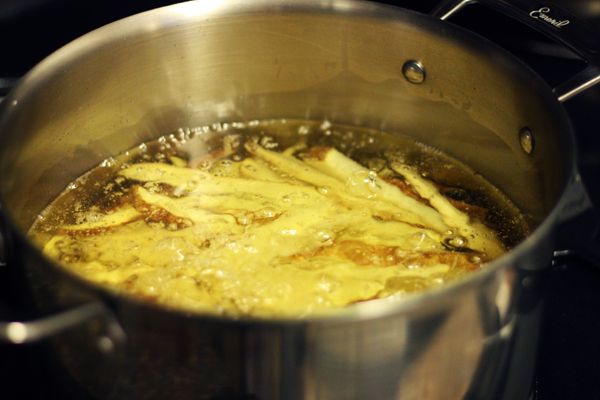
Then, once the fries are so tender you can pierce them with a fork with no effort at all, the heat gets cranked up for the “second cooking”, which will give our fries the crisp outer shell we want.
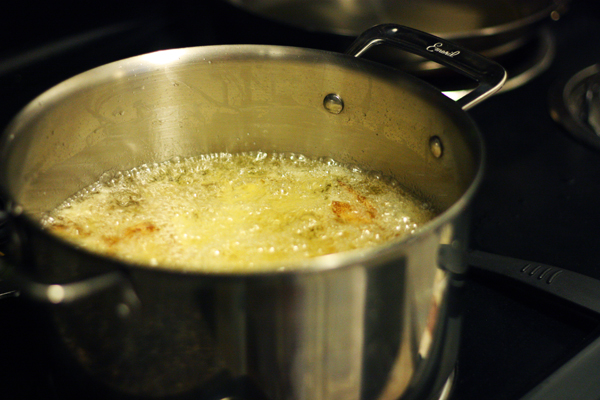
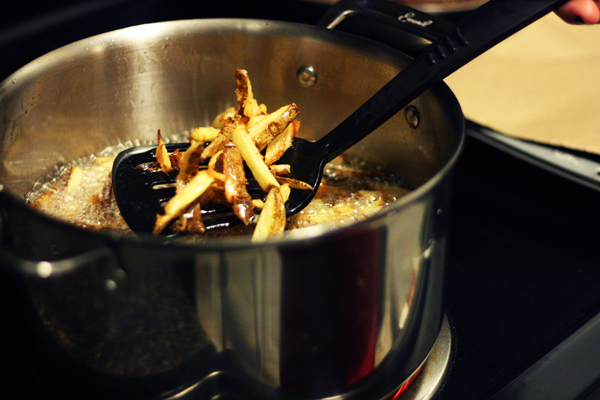
You’ll be able to feel the difference with your spatula as the fries begin to crisp. They will be easier to move around the pot and will clank against one another as hard objects rather than soft ones. It’s only a matter of minutes after that before their color changes to golden brown and they are ready to remove from the oil.
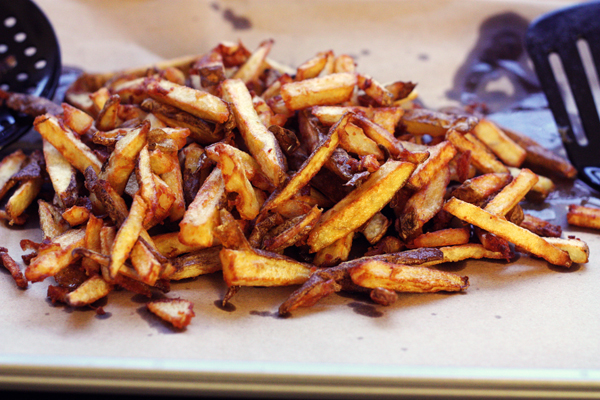
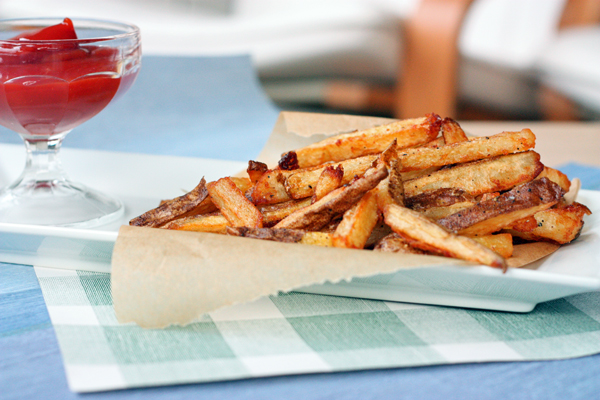
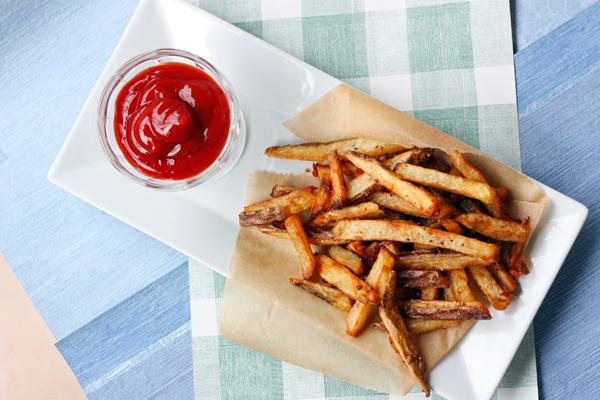
Out of the oil, I seasoned these fries with sea salt and freshly ground black pepper. It took all my willpower not to eat them all before I finished photographing them.
These fries are truly splendid. They’re not instant, but they can be ready in less than an hour, and the slow-cooking allows you to work on other dishes at the same time.
I will never doubt again. (Ha.)

Also!
30 Pounds of Apples has been nominated for The Homies, a series of blog awards from Apartment Therapy and The Kitchn!
My site has been nominated in TWO categories: Best Recipe Blog & Best Food Photography on a Blog. First round of voting is this week, and you can vote once in each category. If I stay in the top six, I move on to round two!
If you like what you read here, please go vote! If you don’t already have an Apartment Therapy account you have to make one, but it’s easy and they don’t spam you, the account is their way of preventing spam comments on their own sites. I’d love your support!
Really Awesome Homemade French Fries
Adapted from Bon Appétit
2 pounds Russet potatoes
2 quarts vegetable oil (may need slightly more or less, depending on the size of your pot)
sea salt
freshly ground black pepper
Vigorously scrub potatoes to remove any dirt particles and remove any eyes with a knife. Pat dry. Cut potatoes into long strips, about 3/8″ inch on each side. If you are using a knife, you can slice each potato into 3/8″ sheets, then slice each sheet to form the strips. Spread the strips evenly in the bottom of a large, wide-bottomed pot or Dutch oven, stacking them no more than two or three deep. Pour the vegetable oil over the strips until they are covered by about an inch.
Line a cookie sheet with paper towels, or my preference, one side of a brown grocery bag, and set aside.
Place the pot over medium heat. Once the oil begins to bubble, continue to cook, uncovered, for 10-15 minutes. Use a heat-safe spatula to occasionally loosen the strips from the bottom of the pot and turn them, taking care not to splash hot oil on yourself. Once the potatoes are very tender and can be pierced effortlessly with a fork, increase the heat to medium-high. Cook the fries for another 10-15 minutes, turning often with the heat-safe spatula, until they are golden-brown and crisp. Working quickly to avoid burning them, lift the fries from the oil with a slotted spatula or spoon and dump them on the paper-lined cookie sheet. Once all fries are out of the oil, turn off the heat and allow the oil to cool.
Keeping the fries on the cookie sheet, season lightly with sea salt and freshly ground black pepper. Toss fries to evenly distribute the seasoning and add more salt and pepper as needed.
Serve immediately, or, if you have a bit to wait until dinner, place the cookie sheet in the oven. Heat the oven to 200°F and then turn it off so that the fries stay warm but do not continue to cook. Remove from the oven immediately before serving.
Kate.
February 2, 2013 @ 11:00 am
Love homemade french fries! I have a potato slicer and love, love, love it. It’s one of the few “gadgets” that I own like that. Also – I use a few tablespoons of oil and bake them on a rimmed baking sheet (at like, 450 for 45 minutes – flip half way through) and get pretty good results. Sprinkle a little cayenne on them and dip them in ranch. YUM!
Suzy
February 2, 2013 @ 12:38 pm
Yum! Love fried potatoes!!!!!
Julia
February 6, 2013 @ 9:55 am
I love homemade fries!! You are making my mouth water and it is only 9am! :)
Amy Z.
February 8, 2013 @ 12:29 am
These fries look amazing! And definitely much easier to make than other methods!
Tasha @ Homemade
February 17, 2013 @ 5:47 pm
Yummy this looks sooo delicious.
Tom
March 20, 2013 @ 11:23 pm
I’ve done this recipe twice and the fries are great. I am now living in Asia and my wife and I miss the fries we got from Chicago hot dog stands. These fries really made our day. Thanks.
Mary
March 21, 2013 @ 5:36 pm
I have a deep fryer. I wonder if this would work if I put the fries in before I turned on the deep fryer. I would then cook them at a lower temp until they were tender and then crank the heat up high to get them crispy.
It’s almost time to change the oil and clean my fryer, so I think I’ll try it your original way first. I’ll just save the oil to replace the old oil in the fryer.
Kristi @ 30 Pounds of Apples
March 28, 2013 @ 12:16 am
I would guess that would work just fine. I don’t have a deep fryer which is why I use the pot. If you try it, let me know how it goes!
Sharna
May 11, 2013 @ 7:47 pm
We just made them as directed in the recipe (and they were fantastic!) but also plan to try them in the fryer too…. Can’t wait to try them again. These were pretty easy. Mine took a bit longer to crisp up thank I expected and I had a lot of breakage. Though they didn’t stick to the bottom of the pan at all. I used a chicken fryer. Thanks for the great directions!!!
Mary
March 21, 2013 @ 8:06 pm
I had to come back and comment. I made these tonight and decided to use my deep fryer. They turned out delicious!
One of my sons has several anaphylactic food allergies and very limited allowed foods. I have to be careful buying frozen french fries because of added ingredients (milk, wheat, etc). These were perfect to try since it was just the potato and oil. So thankful to find this recipe! The entire family thought they were good. I’m excited to make again and add different seasonings. I’m thinking garlic and parmesan cheese (for the adults)
Kristi @ 30 Pounds of Apples
March 28, 2013 @ 12:15 am
I’m so glad you had success! I too am excited to play with different seasonings in the future!
Nihyae
April 27, 2013 @ 8:31 pm
I love homemade fries, I make them for my family all the time, but this is the first time I’ve made them in a pot. How do you keep them from sticking to the bottom, mine did and caused them to break.
Kristi @ 30 Pounds of Apples
April 27, 2013 @ 9:51 pm
I stir mine fairly frequently. I usually end up with a few sticking to the bottom, but not enough to cause problems. How deep of a pot are you using? You might want to use a deeper one that allows the fries to circulate easily.